Note: The below cross reference list is for reference only. To avoid any mismatching, please make sure that the tip size of your original adapter is similar as the connector tip we listed therein.
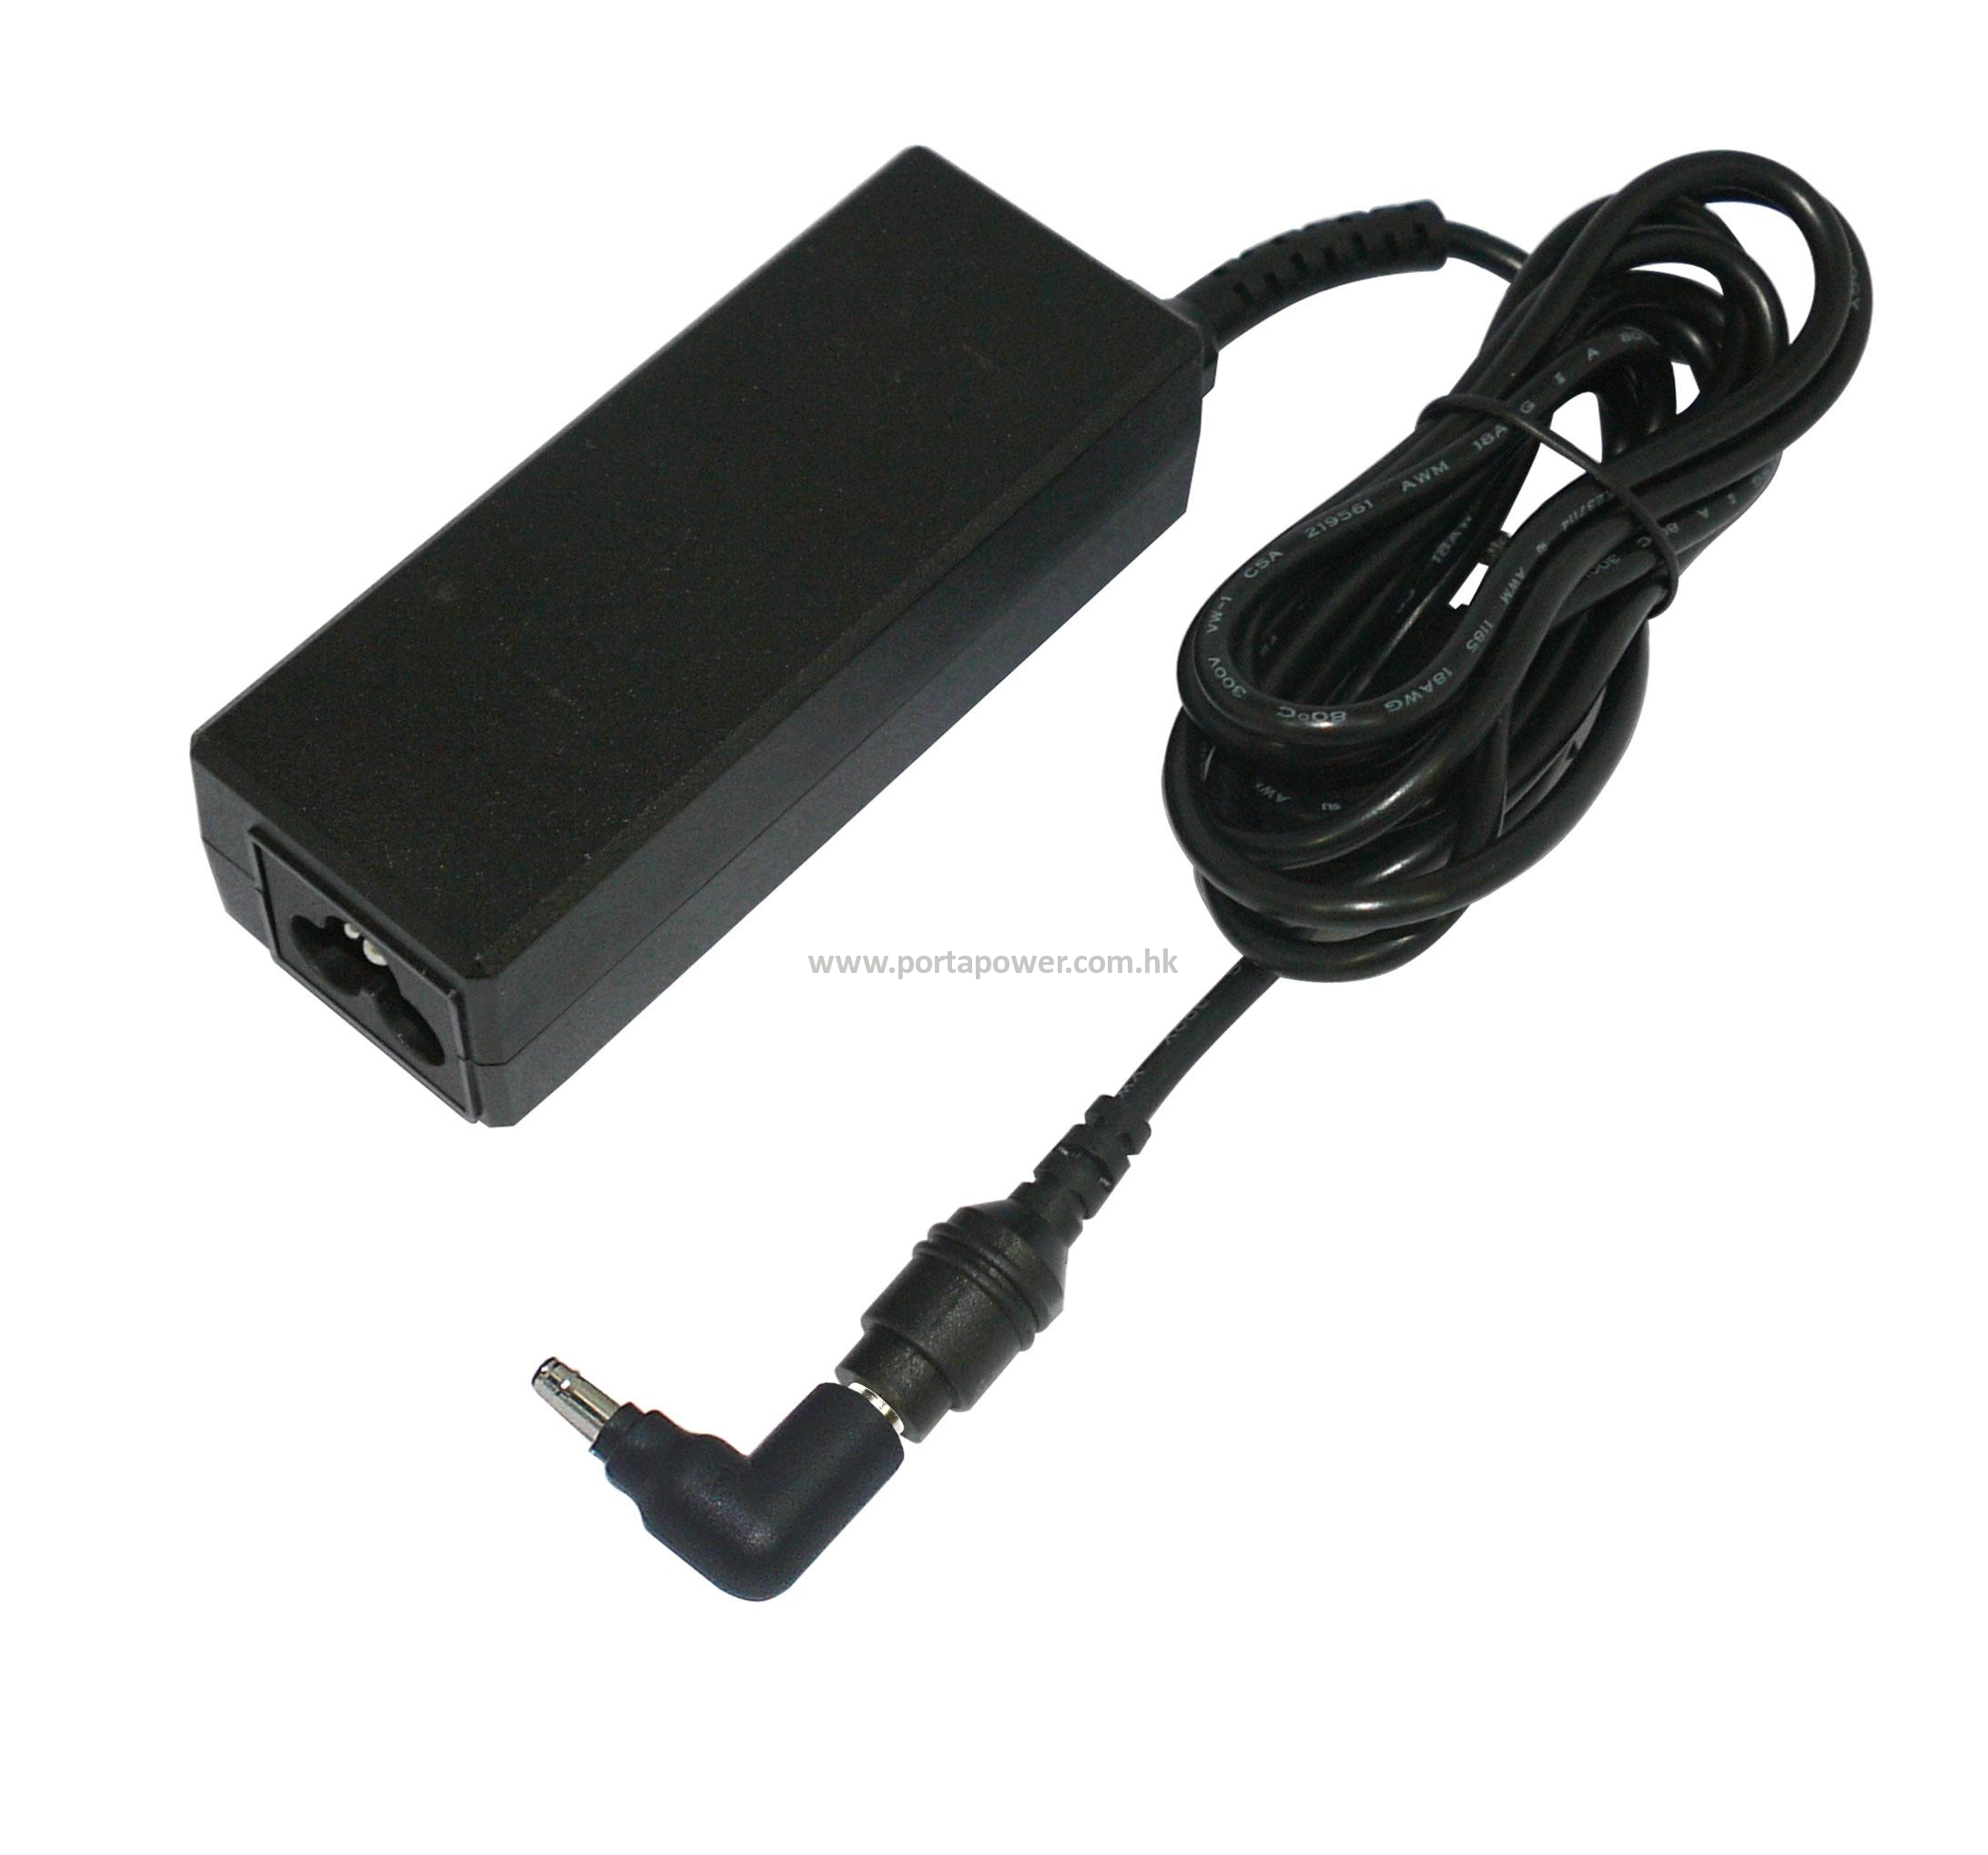
Our adapters are powerful and convenient as they have a wide range of interchangeable tips compatible for 90% laptops. They provide an automatic switching function from the voltage of 100V to 240V. They could speed up the charging time and provide high output current; and are of ideal power assistant for your laptop.
Combo Sets for Choice
Product Code
Weight
Descriptions
AC046A.011C1
260.85 g
LA.060 + C1
AC046E.011C1
270.05 g
LE.060 + C1
AC046K.011C1
314.85 g
LK.060 + C1
AC046U.011C1
242.25 g
LU.060 + C1
AC046J.011C1
169.45 g
LS.060 + C1
Optional Accessories
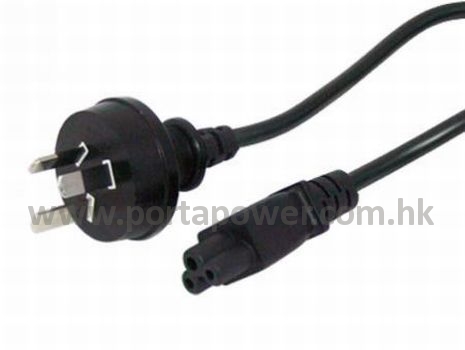
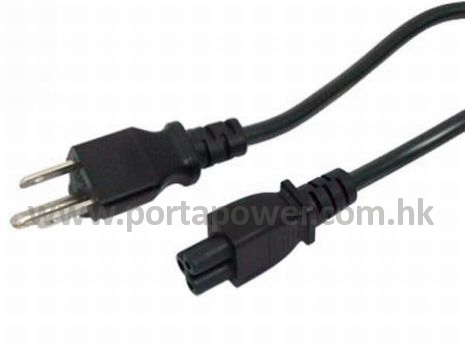
Power Cord
LA.060
Australian Type Adapter Power Cord
Weight:
91.4 g
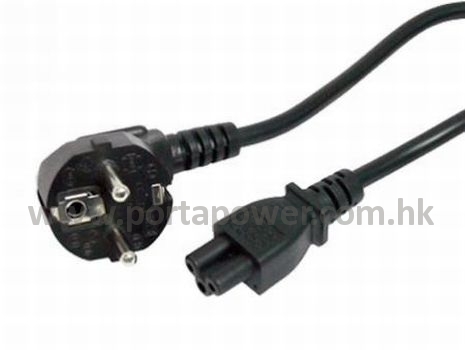
LE.060
European Type Adapter Power Cord
Weight:
100.6 g
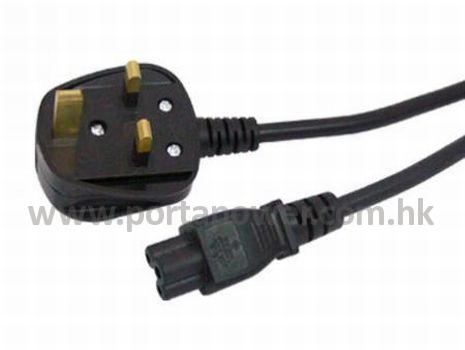
LK.060
British Type Adapter Power Cord
Weight:
145.4 g
LU.060
American Type Adapter Power Cord
Weight:
72.8 g
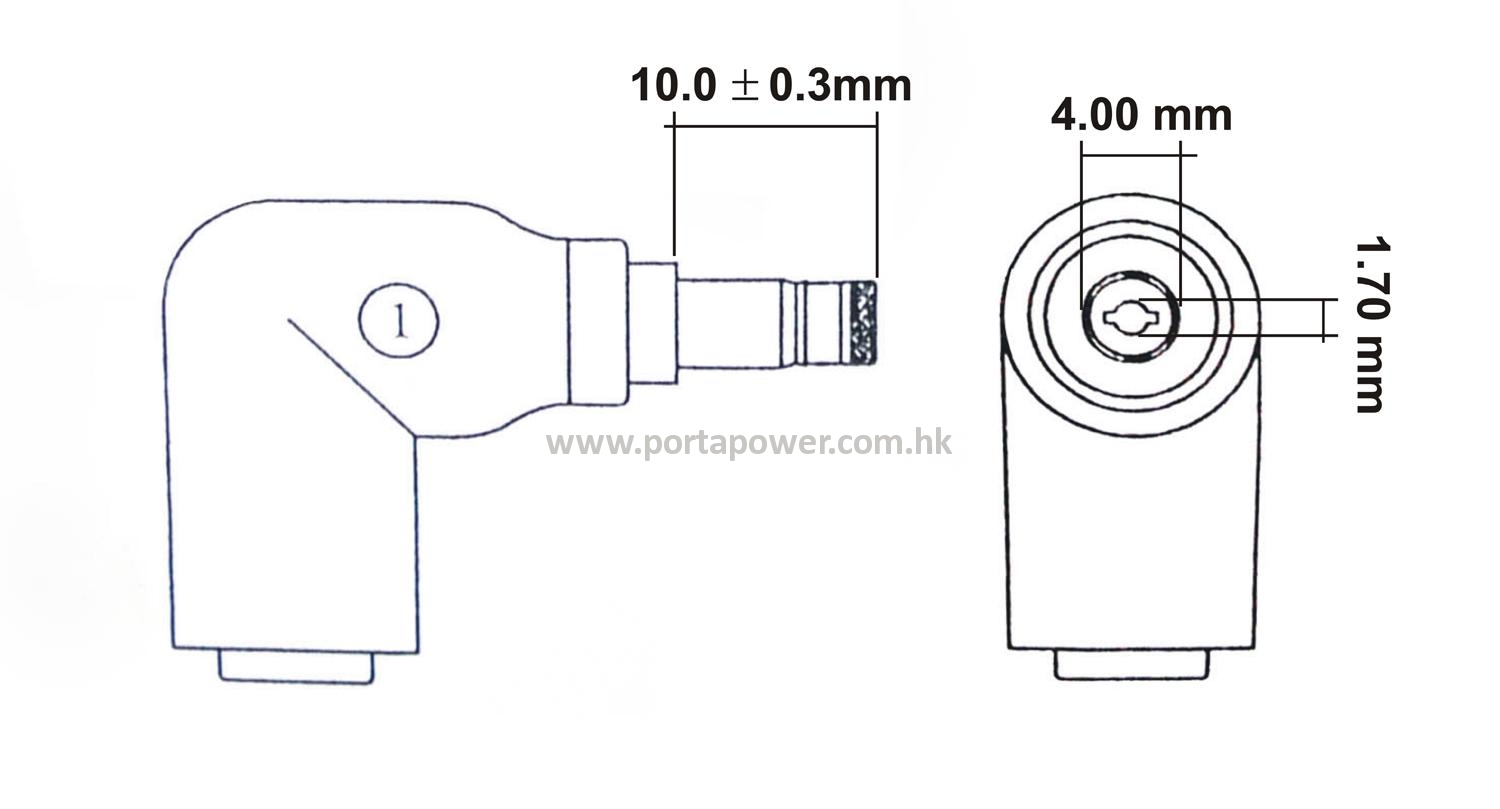
Connector Tips
C1
Connector Tips
Outer Size:
4.0 mm
Inner Size:
1.75 mm
Tip Length:
10 mm
Tip Width:
--
Tip Height:
--
Weight:
8.8 g
Please read the following instructions (3 Parts) carefully for a good understanding of the product and its functions.
Instructions:
Part I. How to choose the right AC Adapter?
Method 1
Check the Output Current of Your Laptop
Special Feature
1) It is alright even If the output current (A) of your laptop adapter is smaller than our AC adapter.
2) There is an allowance of +/- 1 Voltage of our adapter.
You could go to check your original laptop or adapter now.
Step 1a:
Refer to the label on AC adapter for your device - to check the "Output" power requirement.
Step 1b:
Check the label stuck on the device - to see the "Input" power requirement.
Method 2
Calculate the Current Output of Your Original Adapter
Part II. Use of AC Adapter
Step 1:
Connect the power of your adapter.
Step 2:
LED display light up when power is connected.
Step 3:
Select the correct plug tip that could fit into the laptop DC jack tightly and steady.
Step 4:
Connect the provided output cable with the plug tip.
Step 5:
Plug the other side of the cable into our AC Adapter.
Part III. Safety Instructions and Warning
Do NOT use this adapter for charging devices other than the specified ones. Improper use of the adapter or attempting to charge devices using non-rechargeable batteries may cause fire, electrocution or other hazards.
The adapter is designed only for in-door use under adequate ventilation; and it must be connected to an earthed socket-outlet at any time. There is danger of short-circuit or electrocution in using it in humid rooms or outdoors.
Do not attempt to disassemble or modify this unit. All inspections and repair works should be carried out by qualified service personnel only. No liability will be assumed in the case of non-compliance of safety instructions and usage.
Only use the AC power cord comes with the adapter or the one specified by manufacturer. The power cord must be safely connected.
If the power cord is damaged, it must be replaced by the manufacturer, its service agent or qualified person in order to avoid any hazard.
Unplug the adapter from the power supply before connecting / disconnecting your devices; and when it is no longer in use. Otherwise there is danger of electrocution.
It's a good practice to clean dirty adapter contacts using a cotton swab with low density alcohol. This helps maintain a good connection between the adapter and the device. Otherwise there is danger of electrocution.
During charging, the temperature of the adapter will rise. This is normal and not a malfunction.
Stop charging the device immediately if charging does not complete in reasonable time.
If abnormal smell is detected and case deformity occurred during use, turn off the power supply immediately and unplug the power cord from socket to avoid possible damage or risk (e.g. fire).
Store the adapter in a cool dry place when not in use.
Do not expose the product to direct sunlight and other heat sources (e.g. radiators and other electrical devices, and chimney, etc.), moisture, water, sparks, fire or explosive gas; and to locations where liquids (e.g. condensation and water coming from leaking roofs).
Do not dispose this product together with household waste. The product and its accessories must be disposed in strict accordance with local environmental protection laws and regulations, e.g. the WEEE Directive (2002/96/EC).
Keep the adapter out of the reach of infants and children. Children must not play unsupervised near the product and its connections.